EzyHTTP Create a Website
Updated at 16998043710001. What is a website?
By definition, a website is understood as a collection of web pages that are related in terms of content. These pages are located on at least one web server so that users can access the content that the website wants to convey. There are many ways to access a website. Websites that are publicly accessible (with no restrictions on access) constitute the world wide web. And of course, there are also websites that need to be accessed privately for each use, such as internal websites, individual websites for each company. And you can use EzyHTTP to create a dynamic website easyly and quickly.
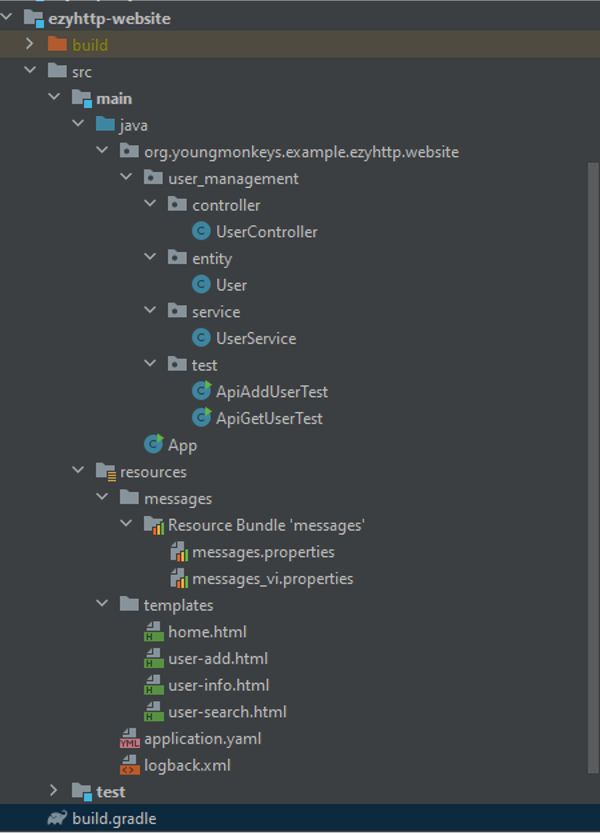
2.1 Project Structure
You can create a gradle project has the structure like this:
 With the dependencies:
    dependencies {
        implementation 'com.tvd12:ezyhttp-server-thymeleaf:' + ezyhttpVersion
        implementation 'com.tvd12:ezyhttp-server-boot:' + ezyhttpVersion
        implementation 'com.tvd12:ezyhttp-client:' + ezyhttpVersion
    }
2.2 Create a web page
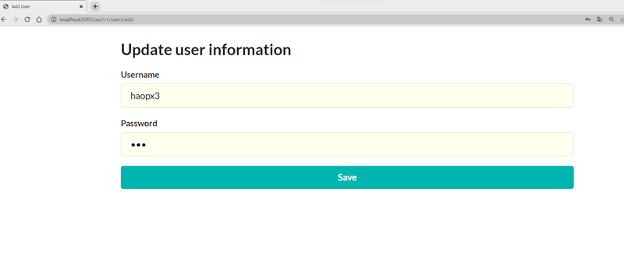
For demo purpose, we will create a website to add and get information of user. The add user page will include 1 form with 2 inputs (username and password), 1 button to submit registration data. This page we named user-add.html:
<html lang="en" xmlns:th="http://www.thymeleaf.org">
<head>
    <meta charset="UTF-8">
    <title>Add User</title>
    <!--    semantic ui-->
    <script src="https://cdnjs.cloudflare.com/ajax/libs/semantic-ui/2.4.1/semantic.min.js"
            integrity="sha512-dqw6X88iGgZlTsONxZK9ePmJEFrmHwpuMrsUChjAw1mRUhUITE5QU9pkcSox+ynfLhL15Sv2al5A0LVyDCmtUw=="
            crossorigin="anonymous" referrerpolicy="no-referrer"></script>
    <link rel="stylesheet" href="https://cdnjs.cloudflare.com/ajax/libs/semantic-ui/2.4.1/semantic.min.css"
          integrity="sha512-8bHTC73gkZ7rZ7vpqUQThUDhqcNFyYi2xgDgPDHc+GXVGHXq+xPjynxIopALmOPqzo9JZj0k6OqqewdGO3EsrQ=="
          crossorigin="anonymous" referrerpolicy="no-referrer"/>
</head>
<body>
<div style="margin-top: 20px; max-width: 450px">
    <h2>Update user information</h2>
    <form th:action="@{/api/v1/users/add}" method="post">
        <div>
            <label>Username</label>
            <input name="username" type="text" placeholder="Username">
        </div>
        <div>
            <label>Password</label>
            <input name="password" type="password" placeholder="Password">
        </div>
        <button type="submit">Save</button>
    </form>
</div>
</body>
</html>
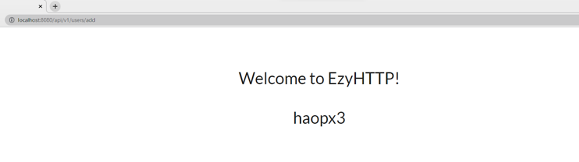
We have one more page, this page after the user is added to the system will return the content: Welcome "username" to ezyfox. The home page with content:
<code data-line-start="1" data-line-end="28" ><!DOCTYPE html>
<html xmlns:th="http://www.thymeleaf.org">
<head>
    <title>EzyHTTH View</title>
    <meta http-equiv="Content-Type" content="text/html; charset=UTF-8"/>
    <!--    semantic ui-->
    <script src="https://cdnjs.cloudflare.com/ajax/libs/semantic-ui/2.4.1/semantic.min.js"
            integrity="sha512-dqw6X88iGgZlTsONxZK9ePmJEFrmHwpuMrsUChjAw1mRUhUITE5QU9pkcSox+ynfLhL15Sv2al5A0LVyDCmtUw=="
            crossorigin="anonymous" referrerpolicy="no-referrer"></script>
    <link rel="stylesheet" href="https://cdnjs.cloudflare.com/ajax/libs/semantic-ui/2.4.1/semantic.min.css"
          integrity="sha512-8bHTC73gkZ7rZ7vpqUQThUDhqcNFyYi2xgDgPDHc+GXVGHXq+xPjynxIopALmOPqzo9JZj0k6OqqewdGO3EsrQ=="
          crossorigin="anonymous" referrerpolicy="no-referrer"/>
</head>
<body>
<div style="margin-top: 20px">
    <div>
        <p>Welcome to EzyHTTP!</p>
        <p th:text="${username}"></p>
    </div>
</div>
</body>
</html>
Notice a bit, this page is only responsible for displaying the username that has just been registered. So we have successfully created the view for this demo (Let's placed the file in the correct directory as the structure).
3.1 Create a model and service
User has the information (username, password) like this:
    @Data
    @AllArgsConstructor
    @NoArgsConstructor
    public class User {
        protected String username;
        protected String password;
    }
We don't use database in demo because the main purpose is show up http interaction via ezyhttp. In the service class, we only save User information into a ConcurrentHashMap. So we have UserService like this:
    @EzySingleton
    public class UserService {
        protected final Map users = new ConcurrentHashMap<>();
        public User addUser(User user) {
            return users.put(user.getUsername(), user);
        }
        public User getUser(String username) {
            return users.get(username);
        }
    }
3.2 Create a controller
We will create an UserController, which will receive a request after the request goes through the servlet. Execute logic operations and return a web page to the user. In this example, the UserController will perform 2 operations:
- Returns
add-user.htmlpage to user for registration - Perform user registration when users make submit form. Logic processing, saving user's information and then return to the home page with the registered user information
Specifically UserController as follows:
    @Setter
    @Controller("/users")
    public class UserController {
        @EzyAutoBind
        protected UserService userService;
        @DoGet("/add")
        public View addUserView() {
            return View.builder()
                    .template("user-add")
                    .build();
        }
        @DoGet("/search")
        public View searchUserView() {
            return View.builder()
                    .template("user-search")
                    .build();
        }
        @DoPost("/add")
        public Redirect addUser(@RequestBody User user) {
            userService.addUser(user);
            return Redirect.builder().uri("/api/v1/users/home")
                    .addAttribute("username", user.getUsername())
                    .build();
        }
        @DoGet("/home")
        public Object home(RequestArguments arguments) {
            String username = arguments.getRedirectionAttribute("username");
            return View.builder()
                    .addVariable("username", username)
                    .template("home")
                    .build();
        }
        @DoGet("/{username}")
        public View getUser(@PathVariable("username") String username) {
            User user = userService.getUser(username);
            String msg = user != null ? "User " + username + " with info: " + user : "User " + username + " not found";
            return View.builder()
                    .addVariable("message", msg)
                    .template("user-info")
                    .build();
        }
    }
We observe 3 annotations handling methods including:
@DoGet("/add"): For add user web page.@DoPost("/add"): Register User, redirect to the home page@DoGet("/home"): Returns a web page of user information via username
3.1 Binding data to the view
To bind the username variable to the home view template, we can do like this:
    return View.builder()
        .addVariable("username", user.getUsername())
        .template("home")
        .build();
3.2 Redirect
When we implement POST, PUT, DELETE, PATCH methods (methods that create, update or delete data), after implementation, to be able to return the view to the user, we must use Redirect instead of View. Example:
    return Redirect.builder()
        .uri("/api/v1/users/home")
        .addAttribute("username", user.getUsername())
        .build();
In this method we will tell browser to redirect to /api/v1/users/home with the attached username attribute to be able to display.
4. Run the website
After performing the above steps, you run the ezyhttp-website application, you will get the following results: User registration page(Add page) Link: http://localhost:8080/users/add
After registering, the system will return the home page with the newly registered user information like this: http://localhost:8080/users/home
For entire example you can take a look ezyhttp-website example on Github.