Create Gradle Project
Updated at 16856792060001. Introduction
Gradle is a build automation tool for multi-language software development. It controls the development process in the tasks of compilation and packaging to testing, deployment, and publishing. Supported languages include Java (Kotlin, Groovy, Scala), C/C++, JavaScript. Gradle builds on the concepts of Apache Maven and It can use libraries downloaded by Maven. Gradle features include:
Running Gradle Builds
- Performance
- Build Scans
- Execution Options
Authoring Gradle Builds:
- Build Logic is Testable Code
- Dependency Management
- Standardizing Gradle Across Teams
- Software Domain Modeling
- Gradle Plugin Authoring
Ecosystem-specific Features
- JVM Applications
- Android Applications
- Native Applications
Features for Developer Tool Providers
- Embed Gradle with Tooling API
- Customizable Logging
For more information, please read on Gradle official site
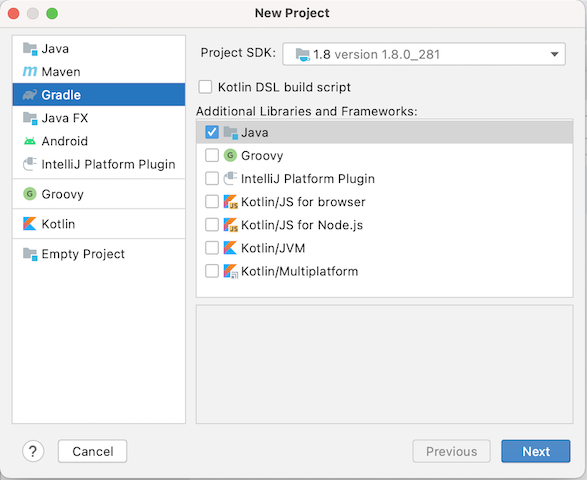
2. Create single project on IntelliJ
Let's say, we need create a project named crm (Customer Relationship Management) for our company. On IntelliJ select File -> New -> Project
Click to Next and you will get:
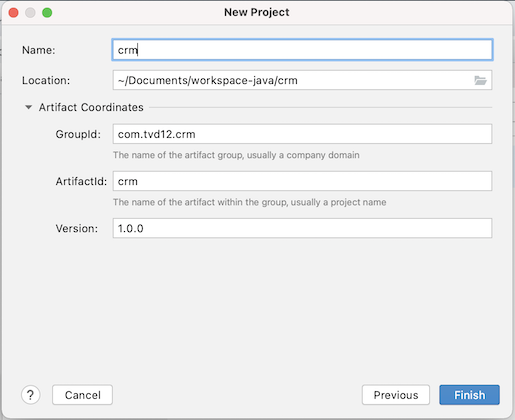
Fill all required fields, example:
Name: crm
Location: workspace-java/crm
GroupId: com.tvd12
ArtifactId: crm
Version: 1.0.0
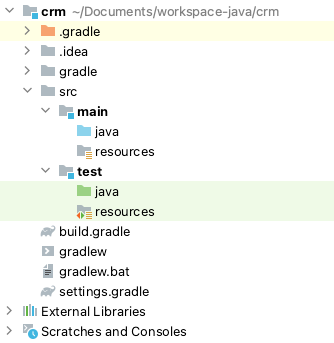
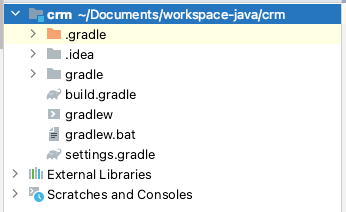
And click to finish and you will get:
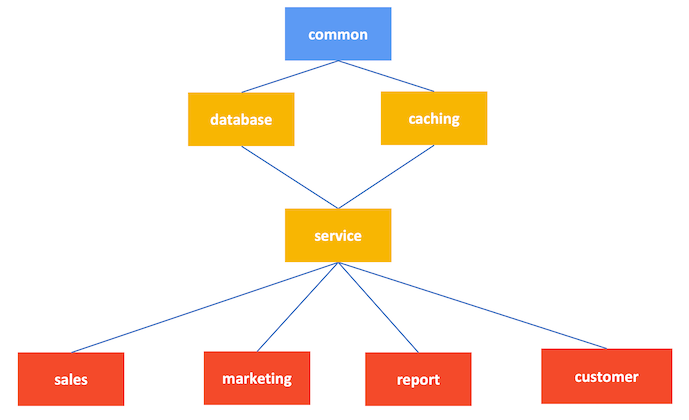
2. Create multi modules project on IntelliJ
In common, we will always have multi module in a project and in the our crm project we need include:
- Sales: for sale management
- Marketing: for marketing management
- Report: for report management
- Customer service: for customer management
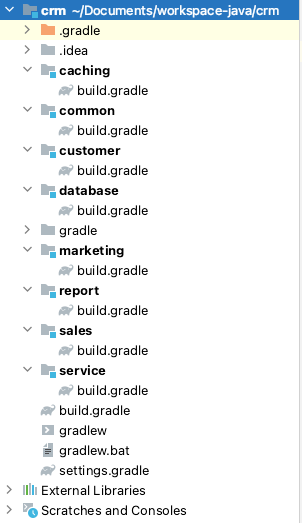
Let's say we will have crm's modules like this:
Now, let's change our crm project First step, delete src folder and we will have:
Second step, change build.gradle like this:
    plugins {
        id 'java'
        id 'idea'
    }
    allprojects {
        group 'com.tvd12.crm'
        version '1.0.0'
        repositories {
            mavenCentral()
        }
    }
    subprojects {
        apply plugin: 'java'
        apply plugin: 'idea'
        sourceCompatibility = 1.8
        repositories {
            mavenCentral()
        }
        dependencies {
            testImplementation 'org.junit.jupiter:junit-jupiter-api:5.6.0'
            testRuntimeOnly 'org.junit.jupiter:junit-jupiter-engine'
        }
        test {
            useJUnitPlatform()
        }
    }
Third step, change settings.gradle like this:
    include ':common'
    include ':database'
    include ':caching'
    include ':service'
    include ':sales'
    include ':marketing'
    include ':report'
    include ':customer'
    rootProject.name = 'crm'
Fourth step, create modules create folder common with build.gradle file like this:
    dependencies {
        implementation 'com.tvd12:ezyfox-util:${testUtitlitiesVersion}'
    }


create folder database with build.gradle file like this:
dependencies {
implementation project(':common')
}
create folder caching with build.gradle file like this:
dependencies {
implementation project(':common')
}
create folder service with build.gradle file like this:
dependencies {
implementation project(':caching')
implementation project(':database')
}
create folder sales with build.gradle file like this:
dependencies {
implementation project(':service')
}
create folder marketing with build.gradle file like this:

```groovy
    dependencies {
        implementation project(':service')
    }
create folder report with build.gradle file like this:
    dependencies {
        implementation project(':service')
    }
create folder customer with build.gradle file like this:
    dependencies {
        implementation project(':service')
    }
fifth step, sync gradle project and we have:
you can found completed source code here
2. Create android project on Android Studio
Create an android project almost same java project, but it's have android block in build.gradle file like this:
    android {
        compileSdkVersion 28
        defaultConfig {
            applicationId "com.tvd12.freechat"
            minSdkVersion 25
            targetSdkVersion 28
            versionCode 1
            versionName "1.0"
            testInstrumentationRunner "android.support.test.runner.AndroidJUnitRunner"
        }
        buildTypes {
            release {
                minifyEnabled false
                proguardFiles getDefaultProguardFile('proguard-android.txt'), 'proguard-rules.pro'
            }
        }
        compileOptions {
            sourceCompatibility JavaVersion.VERSION_1_8
            targetCompatibility JavaVersion.VERSION_1_8
        }
        kotlinOptions {
            jvmTarget = '1.8'
        }
    }
and project's structure like this:
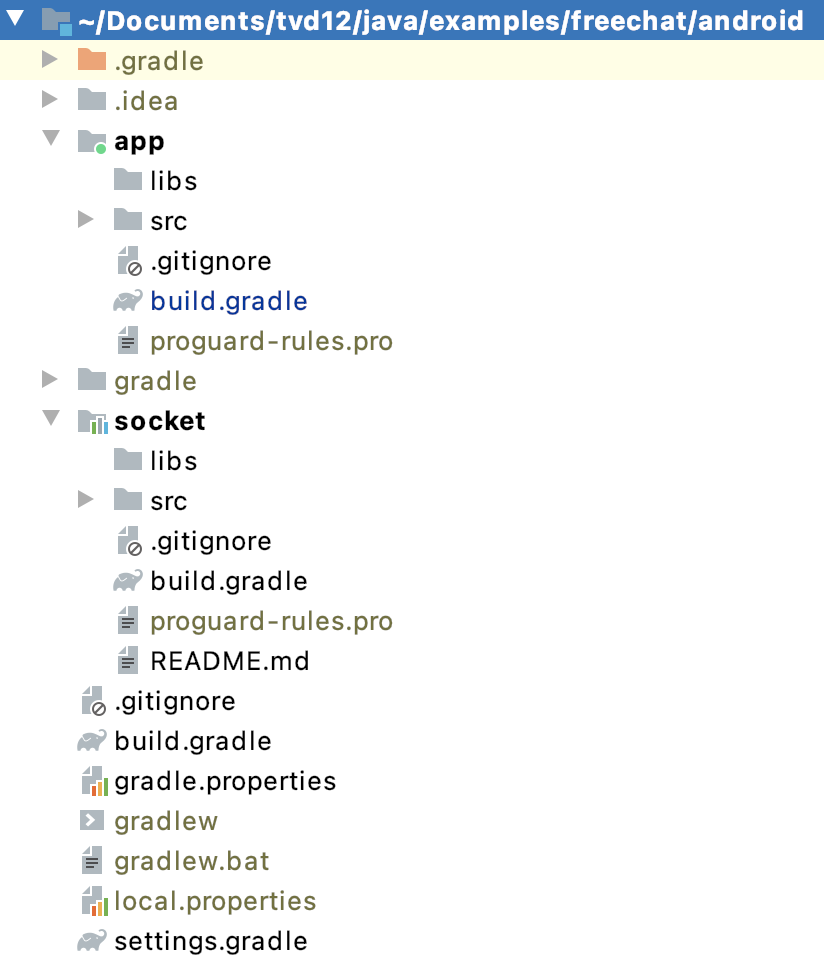
for completed source code, please refer freechat android project.
3. Conclusion
Gradle is a robust tool to manage, build and deploy source code. With Intellij, Gralde has become a main player in the world. For beginner, for android I think gralde is a good choice.