Create a plugin
Updated at 1762307238000To create a plugin project, you will need to go through the following steps.
Installing EzyPlatform
You can find installation instructions here.
Installing EzyPlatform SDK
- Download the ezyplatform SDK from the homepage.
- Extract the downloaded file, for example to the following path:
app/ezyplatform-sdk. - Set the environment variable
EZYPLATFORM_SDKto point to the extracted folder:
export EZYPLATFORM_SDK=app/ezyplatform-sdk
- Add the SDK's `bin` folder to the `PATH` variable to use the `ezy.sh` tool:
export PATH=$PATH:$EZYPLATFORM_SDK/bin
Example on Linux:
Open the configuration file with the command:
nano ~/.bash_profile
Add the following lines to the file:
export EZYPLATFORM_SDK=app/ezyplatform-sdk
export PATH=$PATH:$EZYPLATFORM_SDK/bin
Save and apply the changes:
source ~/.bash_profile
Example on Windows:
- Open
Control Panel → System and Security → System. - Select
Advanced system settings → Environment Variables. - In the
System variablessection, clickNewto add a new variable:- Variable name:
EZYPLATFORM_SDK - Variable value:
C:/path/to/app/ezyplatform-sdk
- Variable name:
- Find the
Pathvariable in theSystem variableslist and clickEdit. - Add the path to the SDK's `bin` folder:
%EZYPLATFORM_SDK%/bin
- Click
OKto save the changes.
Building necessary libraries
Make sure you have already installed apache maven before.
- Clone the ezyplatform-development repository.
- Navigate to the cloned ezyplatform-development directory and run the command:
bash build.shor.\build.batfor windows.
Creating a plugin project
- Move to the directory containing your projects.
- You can run the command:
ezy.shand see the project creation guide as follows:
create, create-project, cp, -cp <project name> \
    -g <group name, example: com.your_company> \
    -p [package name, example: com.your_company.my_project] \
    -v [version, example: 1.0.0] \
    -i [inclusive modules: *,admin-plugin,socket-app,socket-plugin,theme,web-plugin] \
    -e [exclusive modules: admin-plugin,socket-app,socket-plugin,theme,web-plugin] \
    -a [author] \
    -o [output directory]: to create a project
Let's say you want to create `hello-word` project with 3 modules are `admin-plugin`, `theme` and `web-plugin` with groupId is `com.example` you can run the bellow command:
For linux
ezy.sh cp hello-world -g com.example -i admin-plugin,theme,web-plugin
For windows
ezy.bat cp hello-world -g com.example -i admin-plugin,theme,web-plugin
Running the plugin project
Make sure you're using Java 8.
Suppose you have just created a project named
hello-world.- Navigate to the hello-world directory.
- Import the hello-world project into IntelliJ IDE. Note that if your IntelliJ does not recognize the
EZYPLATFORM_HOMEpath variable, you may need to follow the instructions to fix the IntelliJ not recognizing the path variable. - Run the command:
bash export.shto export the project components toEZYPLATFORM_HOME. - Locate the
HelloWorldAdminPluginStartupTestfile in thehello-world-admin-pluginmodule within thesrc/test/[package name]/directory. - Run this file.
- Open a web browser and access the URL: http://localhost:9090 - this is the admin interface.
- In the admin interface, navigate to
Plugins/Admin, find the hello-world plugin, and activate it. - Restart
HelloWorldAdminPluginStartupTest. - Additionally, if you want to start
socket-app,socket-plugin,theme, orweb-plugin, find the correspondingXxxStartupTestclasses in their respective directories.
Configuring the working directory on IntelliJ
By default, IntelliJ will have the working directory set to the root directory, for example,
hello-world. However, to enable ezyplatform-tools to automatically reload HTML, CSS, JavaScript, or other static files, we need to specify the correct working directory to the module being executed.- In IntelliJ, go to the run section and select Edit Configurations...
- In the Working directory section, point it to the corresponding module where the XxxStartupTest file you want to run is located.
If IntelliJ can not recognize path variable, you can look at here to see how to fix.
Exporting a plugin
To publish a plugin on ezyplatform.com or install a plugin for EzyPlatform on your server, you need to navigate to your plugin project, for example,
hello-world, and then export it using the command bash export.sh for Linux or export.bat for Windows.Check the logs and ensure that no errors are thrown. After that, you will have a zip file located in the
hello-world/target/project/hello-world.zip directory. You can use this zip file for publishing or installation.Re-build the plugin on IntelliJ IDE
After export the plugin, you need to re-build the plugin by click to
install on the right side of IntelliJ IDE to start the plugin on IDE normally, I don't know why, maybe it's a bug of IntelliJ.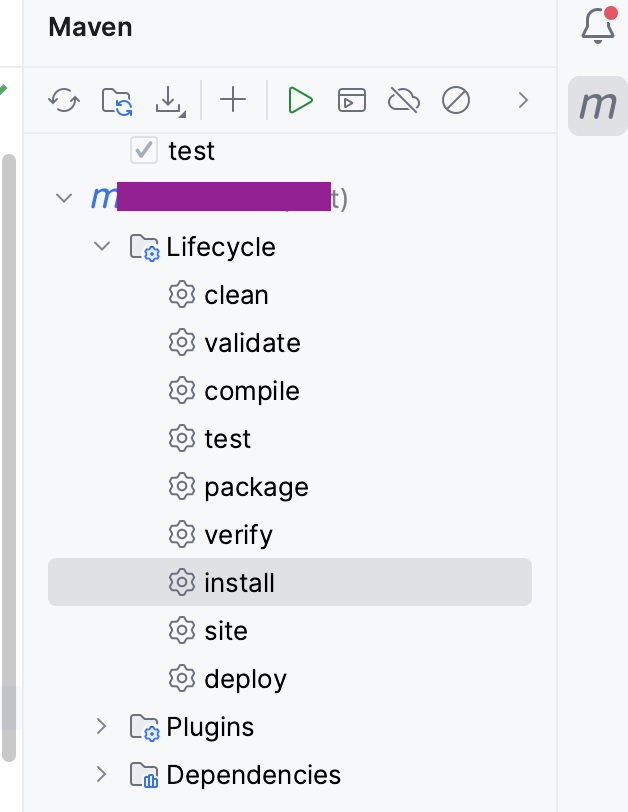
Change working directory
By default, IntelliJ will run the project with the root directory. You will need to change the
Working directory to the corresponding module in order to use the automatic reload feature of ezyplatform-devtools. Assuming you need to run HelloWorldAdminPluginStartupTest of the module, you will need to change the Working directory as follows: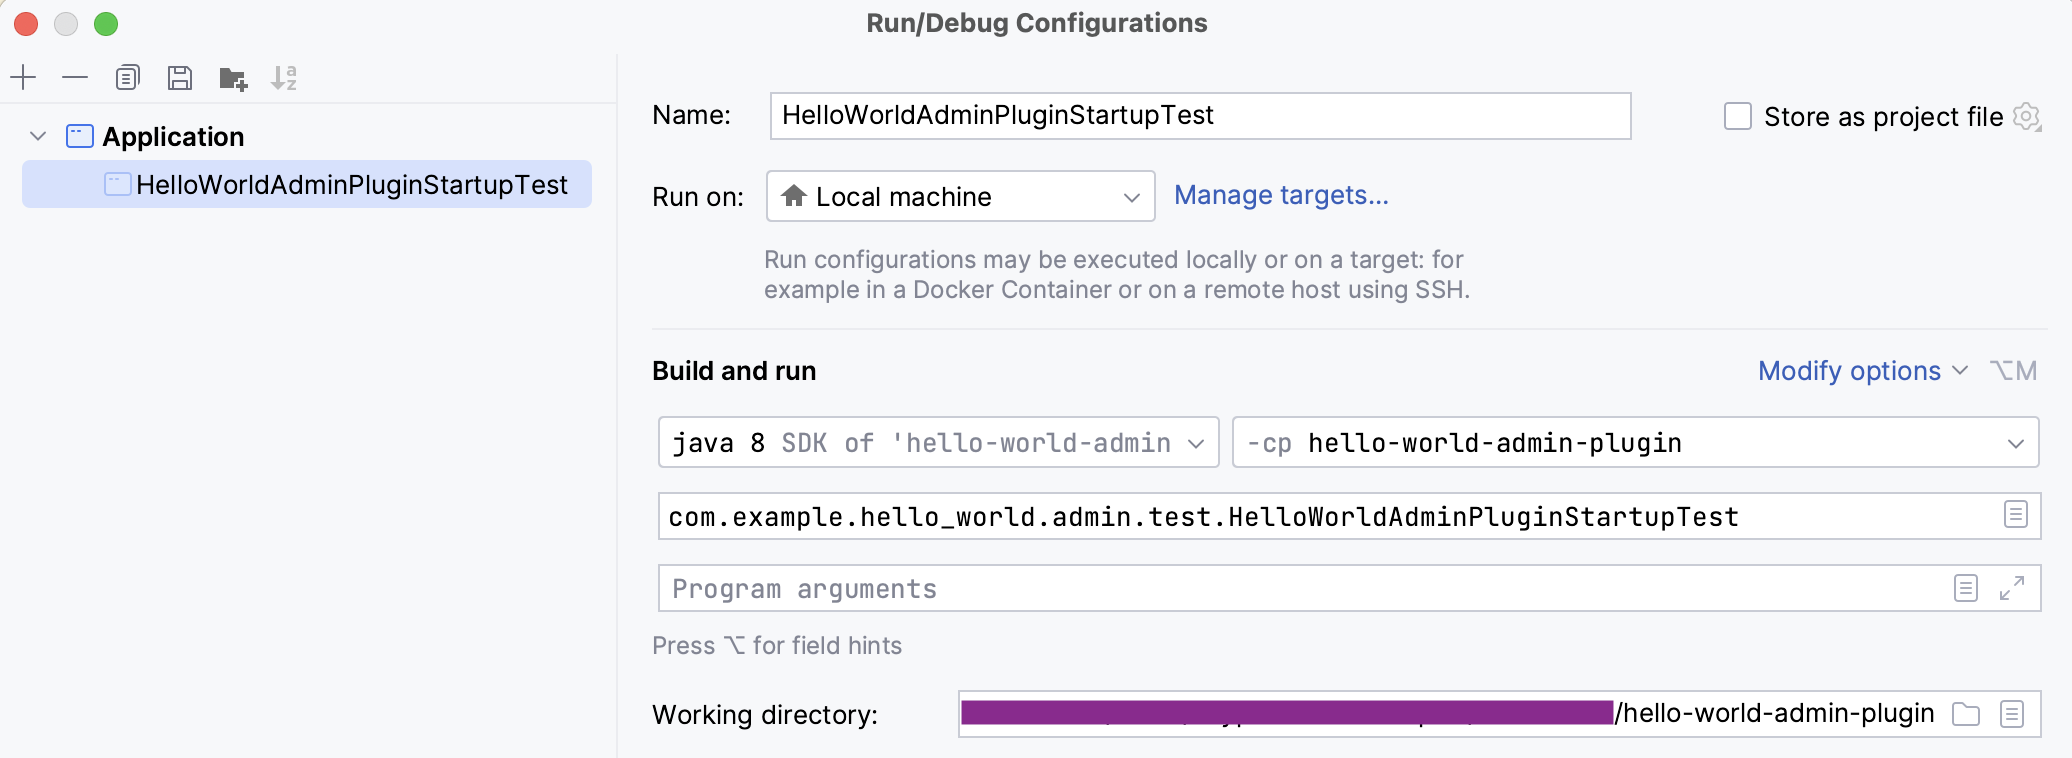
Next step
You can link to difference plugins to reuse features and source code.